Indoor placement for home LED strip and cabinet lighting accessories
Indoor placement means choosing where home LED strip and cabinet lighting accessories should sit so the light supports the space, the task, and the viewing angle. Placement changes visibility, comfort, glare, shadow, and visual effect. Indoor placement directly influences whether the lighting serves task lighting, accent lighting, or a balance of both.
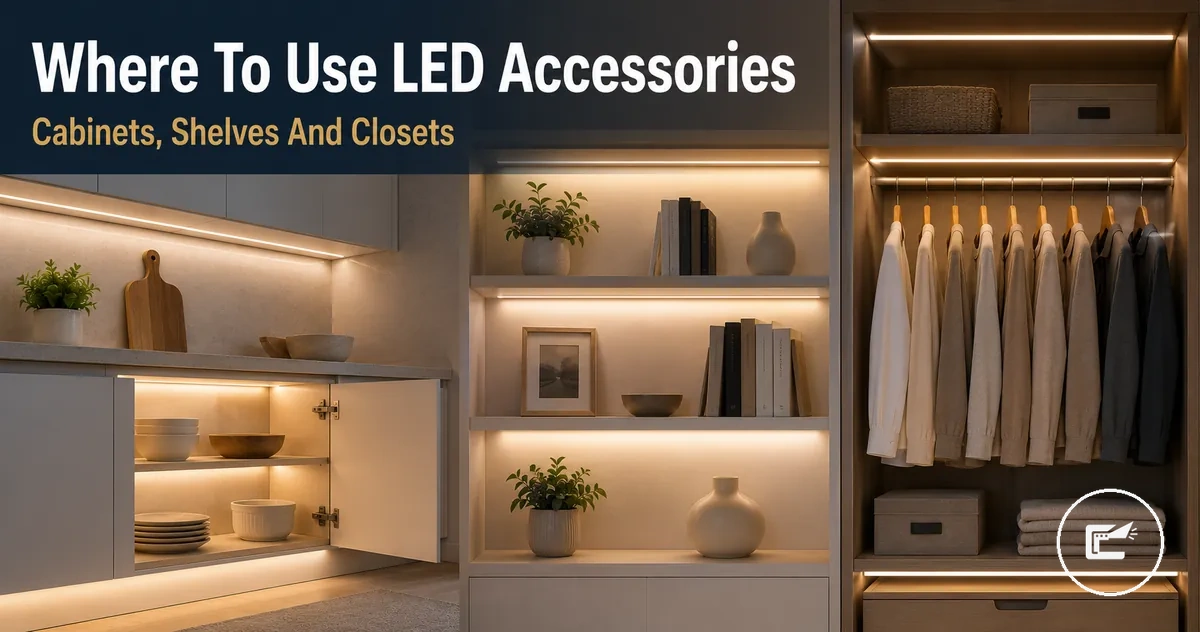
This page covers cabinets, shelves, closets, display cabinets, wardrobes, and small spaces where home LED strip and cabinet lighting accessories can support indoor use. The focus is on how placement affects visibility, display lighting, and everyday use within compact indoor areas. It also considers hidden strip lighting and viewing conditions that can change the appearance of light. This is placement guidance, not an installation procedure.
Useful placement depends on location, purpose, surface condition, viewing angle, brightness, diffusion, and mounting condition. Adhesive placement may suit a clean, flat surface and a short run, while rough surfaces, exposed edges, or heavier strip types may require additional mounting support. The outcome can vary by cabinet shape, strip position, diffuser use, and access requirements. These conditions help establish a purpose-first approach before any mounting decisions are considered.
A strip placed beneath a cabinet can provide work-zone lighting for a surface below, while the same strip placed inside a shelf, closet, wardrobe, or display cabinet may create a soft glow that highlights stored or displayed items. The intended use should guide placement decisions, with visibility, glare control, and visual effect evaluated according to the space and viewing angle.
How placement changes the lighting purpose indoors
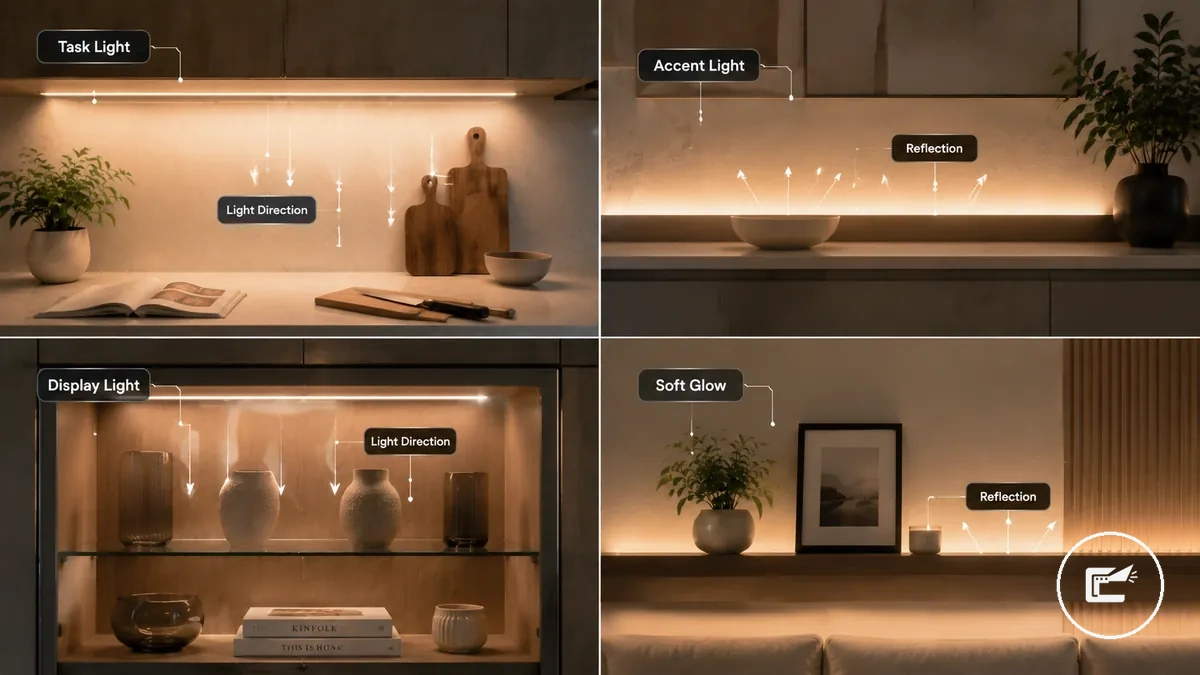
Placement determines lighting purpose because the position of cabinet lighting changes what is illuminated, how the light is seen, and how the space is used. The same LED strip can support different outcomes based on placement, light direction, and viewing conditions. Placement can create task light, accent light, display light, or a soft background glow.
Scenario: a strip directed toward a work surface may function as a task light because direct light improves visibility for a user task. The same strip placed behind an edge or hidden from direct view may create an accent light effect through reflected glow. Light direction, surface reflection, and viewing angle can change how the lighting is perceived. As a result, the lighting purpose may differ even when the strip remains in the same general area.
Placement area, light direction, surface reflection, visibility, and user task are the main factors that shape lighting purpose. A placement becomes more task-focused when light reaches the activity area directly, while decorative effects often depend on concealment and reflection. For broader design considerations, indoor ambience planning can complement placement decisions, but ambience and brightness details remain secondary here.
How placement changes the lighting purpose indoors becomes easier to understand when each outcome is compared through placement behavior. The comparison below organizes common purposes by placement cue and expected light behavior.
| Purpose | Typical placement cue | Light behavior | Best-fit indoor use |
|---|---|---|---|
| Task light | Near a countertop or activity surface | More direct light with improved visibility | Work-focused activities |
| Accent light | Hidden strip near edges or architectural details | Reflected glow that emphasizes visual effect | Highlighting features |
| Display light | Inside display areas or around showcased items | Light draws attention to displayed objects | Display lighting |
| Soft background glow | Concealed placement away from direct view | Gentle illumination with lower visual prominence | Supporting overall room atmosphere |
How placement changes the lighting purpose indoors is illustrated below through task, accent, display, and soft glow examples. The image compares how hidden strip placement, light direction, and reflection can influence the intended lighting outcome.
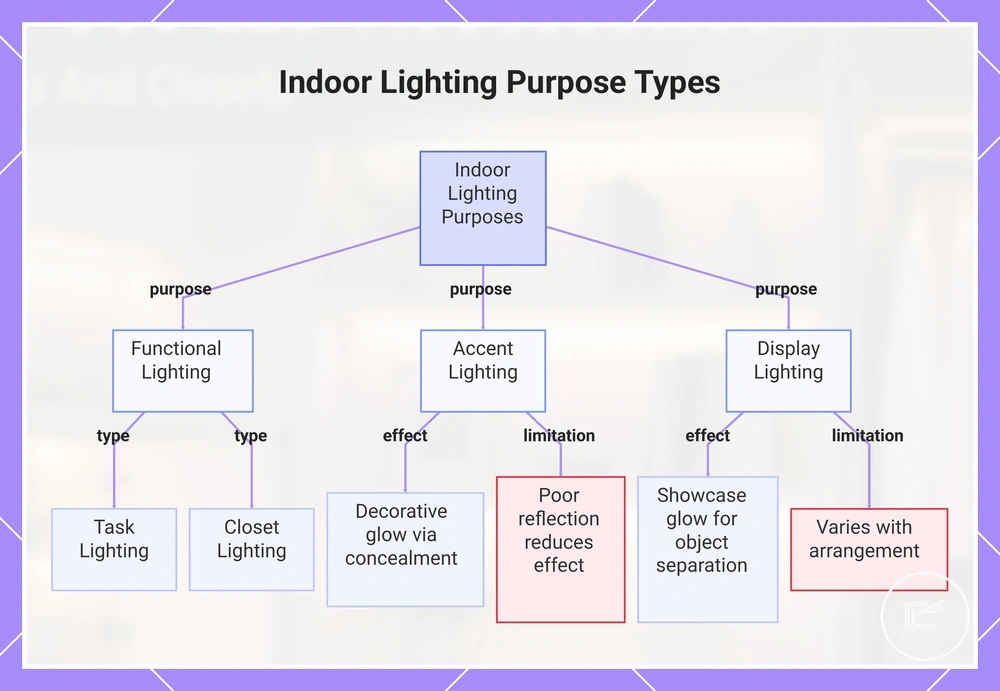
Task lighting, accent lighting, and display lighting
Task lighting, accent lighting, and display lighting represent different lighting purposes within the same indoor placement framework. The distinction comes from placement zone, visibility needs, and the expected lighting effect for task lighting, accent lighting, and display lighting.
The same LED strip can serve different jobs when its placement zone changes across cabinets, shelves, closets, and displays. Purpose, visibility, and surface interaction shape the expected lighting effect in each location. The distinctions below separate each purpose by placement cue, effect, and limitation.
- Task lighting: Placement zone is near a countertop, cabinet work area, or other visibility-focused surface. The expected lighting effect is work light that helps improve visibility and reduce shadow. Limitation: glare or uneven placement may reduce usefulness in some indoor settings.
- Accent lighting: Placement zone is typically a hidden strip along cabinet edges, shelves, or architectural details. The expected lighting effect is a decorative glow created through reflected glow and concealment. Limitation: the effect may appear less noticeable when surrounding surfaces reflect light poorly.
- Display lighting: Placement zone is inside displays, glass-front cabinets, or shelves used to showcase objects. The expected lighting effect is display glow that improves object separation and visual focus. Limitation: results may vary with object arrangement, glass surfaces, and viewing angle.
- Closet lighting: Placement zone is inside closets where stored items need clearer visibility. The expected lighting effect is practical illumination rather than showcase light. Limitation: shelving layouts or stored items may block or redirect light.
This chart groups indoor lighting purposes into functional, accent, and display categories, highlighting their subtypes and key characteristics.
Direct light, reflected glow, and hidden strip effects
Direct light, reflected glow, and hidden strip effects are placement attributes that change how indoor LED strip lighting is perceived. These attributes influence strip visibility, visual comfort, and how light appears on nearby surfaces. The distinction becomes clearer when comparing direct light, reflected glow, and hidden strip effects.
Direct light increases strip visibility because exposed LEDs remain within the viewing angle. Reflected glow depends on surface reflection, wall color, and cabinet material to create a softer appearance, while hidden strip effects reduce direct visibility through concealment and often rely on diffusion for a more softened light effect. Glare risk and perceived brightness can vary with strip density, diffuser use, viewing angle, and surrounding materials, so results may differ between installations.
A visible strip beneath a cabinet may appear more prominent than a concealed strip behind a cabinet lip because the light source remains in view. The perceived difference depends on viewing angle, surface reflection, diffusion, and cabinet material.
Direct light, reflected glow, and hidden strip effects represent different visual outcomes of placement. The comparison below highlights their main attributes and potential limitations.
| Light behavior | Placement cue | What it improves | What can go wrong |
|---|---|---|---|
| Direct light | Exposed LEDs with higher strip visibility | Task visibility and surface illumination | Glare risk may increase when LEDs remain in direct view |
| Reflected glow | Light aimed toward nearby surfaces | Indirect glow and a softer visual effect | Surface reflection and wall color may reduce the effect |
| Hidden strip effects | Concealed strip behind a cabinet lip or edge | Reduced strip visibility and softened light | Outcome may vary with viewing angle, diffusion, strip density, and cabinet material |
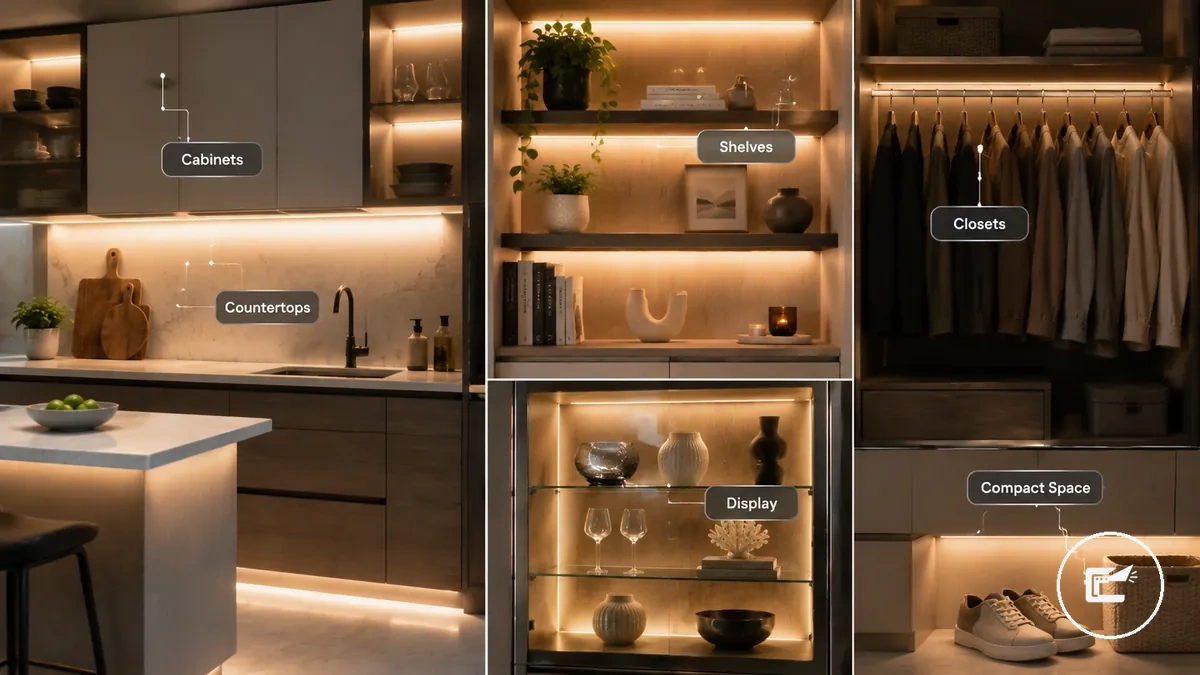
Main indoor areas for LED strip and cabinet lighting
Main indoor areas for LED strip and cabinet lighting include cabinets, countertops, shelves, closets, wardrobes, display cabinets, and compact spaces where visibility, access, or contained lighting can add useful value. These indoor areas are common because lighting needs often relate to a specific task, storage challenge, or display requirement rather than decoration alone. The most useful indoor areas are best understood through purpose, placement effect, and limitation.
Cabinets and countertops are repeated indoor contexts because task visibility can become limited by shadow, depth, or enclosure. Shelves and display cabinets often benefit from contained glow that helps separate objects from surrounding surfaces. Closets and wardrobes are also common indoor areas because access and visibility may become more difficult when storage depth or item density increases.
Indoor areas differ by access, visibility, surface conditions, and object depth, which can influence the placement effect and limitation of each lighting location. Shelf lighting, closet lighting, and display lighting may provide useful results when placement aligns with the intended use, while constraints such as viewing angle or enclosure depth can affect the outcome. More detailed coverage of shelf closet and display cabinet lighting is provided separately. The grouped areas below organize common indoor uses by need and limitation.
Main indoor areas for LED strip and cabinet lighting can be grouped by use rather than by room type. The bullets below organize indoor areas according to need, placement effect, and caution.
- Cabinets: Need: improve visibility inside cabinet interiors. Placement effect: lighting can reduce dark zones and improve access to stored items. Limitation: cabinet depth may still create shadow depending on placement.
- Countertops: Need: support task visibility on a work surface. Placement effect: lighting directed toward the countertop can improve surface visibility. Limitation: exposed strip visibility or glare may affect comfort from certain viewing angles.
- Shelves: Need: improve visibility of stored or displayed objects. Placement effect: shelf lighting can create contained glow around items. Limitation: object depth and arrangement may block or redirect light.
- Closets and wardrobes: Need: improve access to clothing and stored items. Placement effect: closet lighting can make enclosed storage areas easier to view. Limitation: shelving layouts and contents may reduce coverage.
- Display cabinets: Need: increase visibility of showcased objects. Placement effect: display lighting can improve object separation within the cabinet. Limitation: glass surfaces and reflections may influence the perceived result.
- Compact spaces: Need: provide light where space is limited. Placement effect: a short hidden strip run can add light with minimal visual intrusion. Limitation: cable visibility, mounting access, and surface conditions may affect placement options.
Main indoor areas for LED strip and cabinet lighting are shown below as a simple area map. The image labels indoor zones by use to help compare common placement locations at a glance.
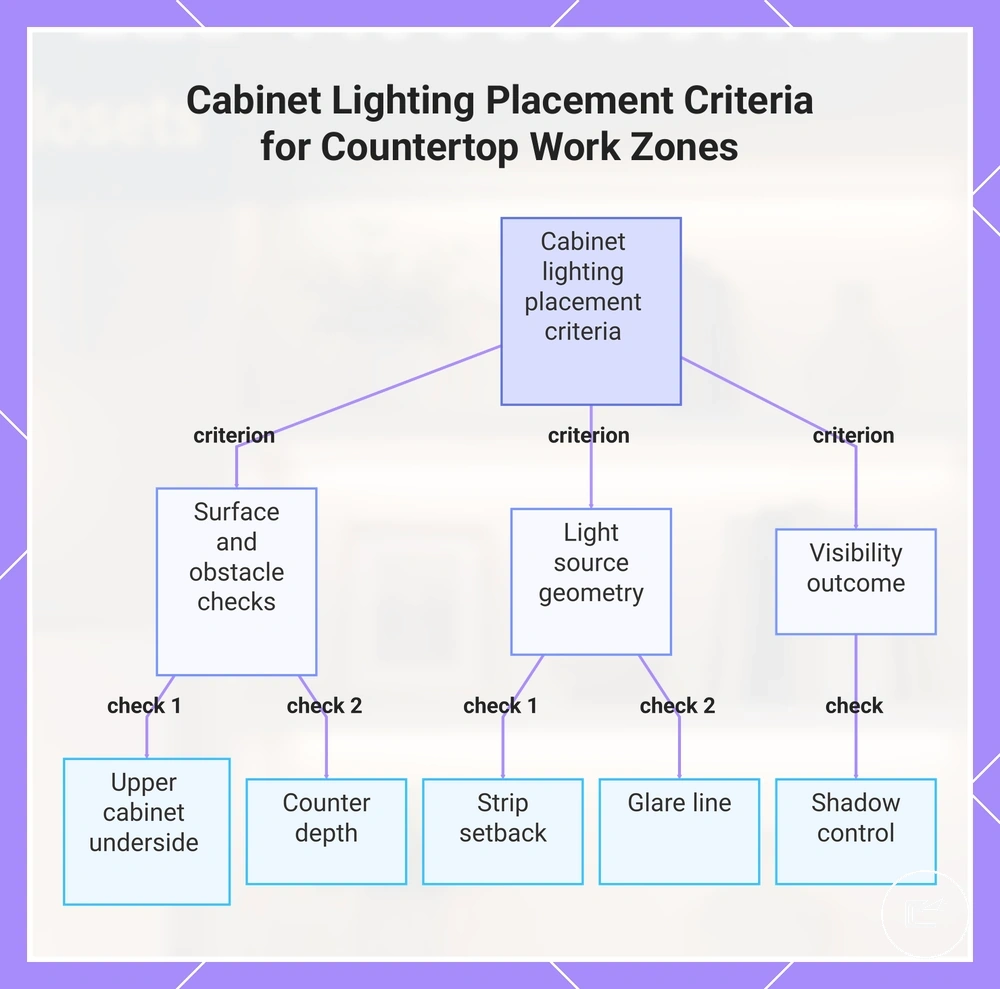
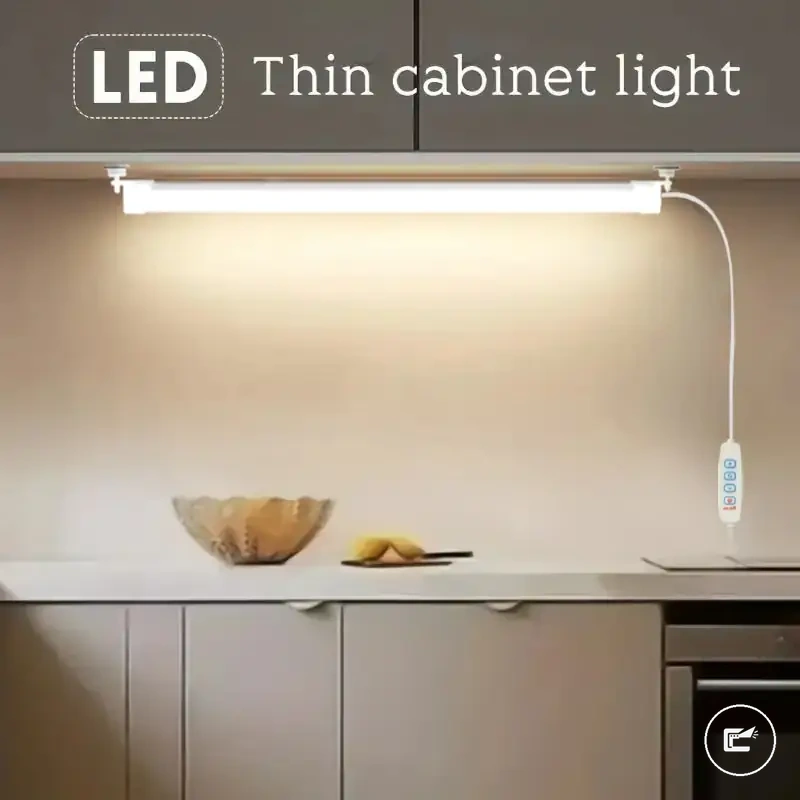
Kitchen cabinets and countertop work zones
When food preparation, cleaning, and everyday cabinet access happen in the same area, kitchen cabinets and countertop work zones depend on clear visibility across the work surface. Light placed near the upper cabinet underside can help direct illumination toward the task area where daily activities occur. The usefulness of cabinet lighting is closely connected to countertop visibility.
Kitchen cabinets and countertop work zones are influenced by the relationship between the upper cabinet underside, counter depth, strip setback, and glare line. A strip setback may reduce direct exposure to the light source when the viewing angle places the glare line within normal sightlines, but the result can vary by cabinet shape and user position. Shadow control often depends on how light reaches the task area, while deeper counters may change which placement location supports the most useful visibility.
Use the checklist below to review local placement criteria that affect visibility and comfort within countertop work zones.
- Upper cabinet underside: Check whether the cabinet underside allows light to reach the task area without creating unnecessary obstruction.
- Counter depth: Consider whether counter depth creates shadow across different parts of the work surface.
- Strip setback: Review whether a setback position may reduce direct strip visibility while maintaining useful counter lighting.
- Glare line: Check the normal viewing angle to determine whether the light source may remain visible during everyday use.
- Shadow control: Assess whether the placement helps illuminate preparation and cleaning zones where visibility is most important.
For more placement-specific considerations, under cabinet placement can be evaluated separately within countertop-focused lighting decisions.
This chart shows the key placement criteria that affect visibility and comfort in kitchen countertop work zones, as outlined in the checklist.
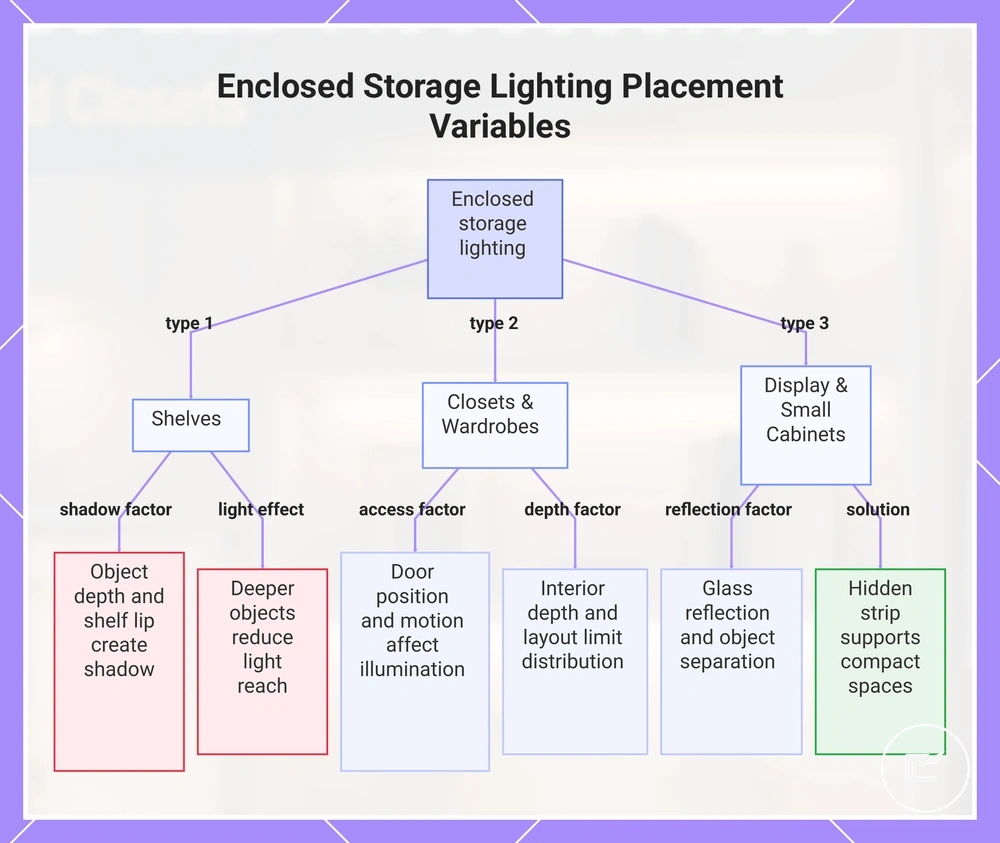
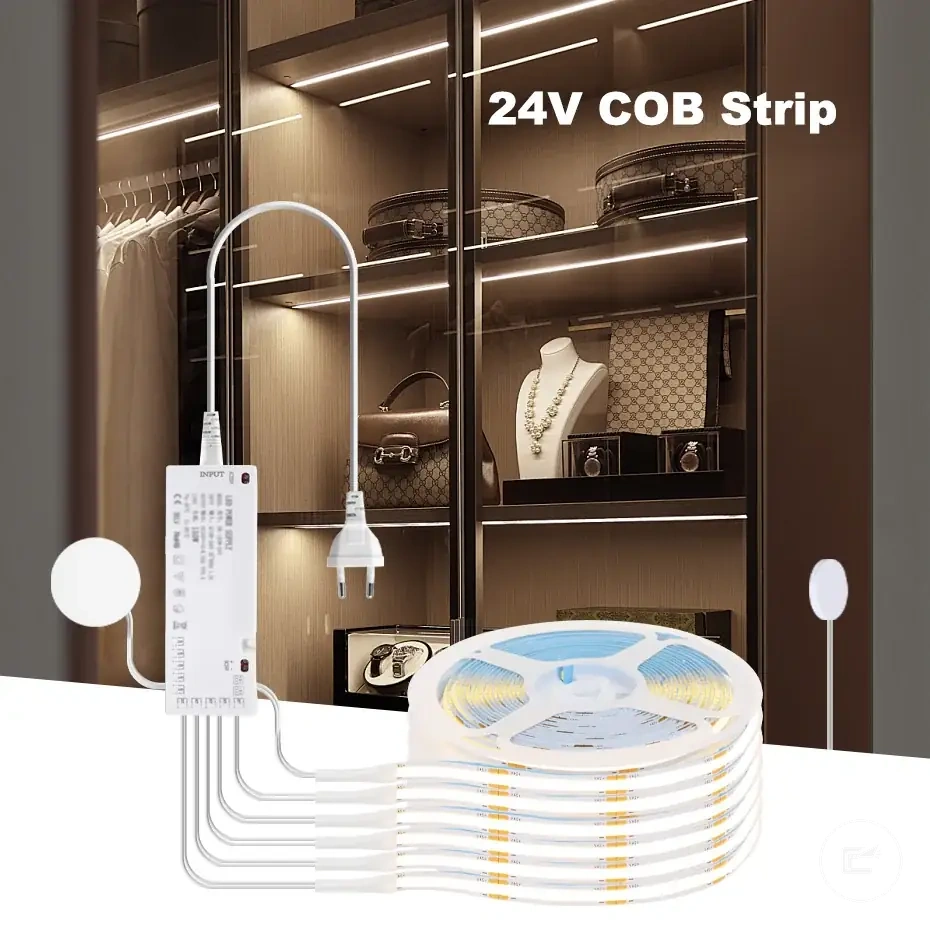
Shelves, closets, wardrobes, and display cabinets
When stored or displayed items sit behind doors, inside compartments, or on deep shelves, shelves, closets, wardrobes, and display cabinets often face the same visibility challenge. Light may need to reach interior objects while limiting direct visibility of the light source. The shared enclosed-space problem is balancing visibility, object separation, and contained glow within a limited area.
Object depth, door position, and glass reflection can influence how light appears inside enclosed storage and display spaces. A hidden strip may create a softer effect when light reflects from nearby surfaces, but the result can vary with shelf lip design, object placement, and viewing angle. Glass reflection may change perceived visibility, while door position and motion access can affect how light reaches the interior when access is needed.
The grouped areas below highlight local placement variables rather than complete lighting solutions.
- Shelves: Object depth and shelf lip design can create shadow around stored items. Shelf lighting may improve visibility, but deeper objects can reduce light reach toward the rear of the shelf.
- Closets: Door position and motion access can influence how light reaches clothing and stored items. Closet lighting may improve visibility, but access patterns can change which areas receive the most useful illumination.
- Wardrobes: Wardrobe lighting often depends on interior depth and storage layout. A hidden strip may reduce direct strip visibility, while hanging items and shelving can limit light distribution.
- Display cabinets: Glass reflection and object separation are common placement concerns. Display glow may help distinguish objects from surrounding surfaces, but reflections and object depth can influence the perceived result.
- Mixed small cabinets: A short hidden strip run may support visibility in compact storage spaces. The outcome can vary with cabinet size, object depth, and available placement locations.
This chart shows the key lighting placement variables for different types of enclosed storage spaces, including shelves, closets, wardrobes, and display cabinets.
Small spaces that need short or hidden light runs
Small spaces often benefit from short light runs or hidden light runs when lighting is needed within a limited area. Compact spaces such as alcoves, cabinet interiors, and corner runs may suit a short LED run when the placement remains practical and accessible. Small-space fit depends on surface access, cable visibility, and maintenance reach as much as concealment.
Short light runs can help focus light within a confined area without extending across larger surfaces. Hidden light runs may reduce direct visibility of the light source, but glare can still depend on viewing angle, surrounding surfaces, and the degree of concealment. Cable visibility and maintenance reach remain important because alcoves, cabinet interiors, and corner runs can limit future access after placement.
Small spaces that need short or hidden light runs can be assessed with the checks below to verify whether the area supports useful placement.
- Alcoves: Check whether the area provides enough surface access for a short light run while preserving maintenance reach.
- Cabinet interiors: Verify whether a short strip improves visibility without creating unnecessary cable visibility inside the space.
- Corner runs: Assess whether the layout allows light to reach the intended area without reducing future access.
- Hidden light runs: Consider whether concealment improves visual comfort from normal viewing angles, while recognizing that hidden placement may still have limitations.
- Maintenance reach: Confirm that the placement remains accessible if inspection, cleaning, or adjustment becomes necessary later.
Placement factors that affect visibility, glare, and shadow
Placement factors determine whether indoor LED strip lighting provides useful visibility or creates distracting visual effects. The evaluation depends on how light reaches the intended area, how visible the LEDs are from normal sightlines, and how surrounding surfaces interact with the light. Visibility, glare, and shadow are the primary criteria for assessing placement quality.
Strip position, direction, viewing angle, and LED exposure influence how light is distributed and perceived. A strip position that improves visibility in one location may create more noticeable glare when the viewing angle changes. Direction affects where light spread reaches and whether a shadow area remains in the task area. LED exposure can make the light source more noticeable, while concealed or diffused placement may change visual comfort depending on cabinet depth, diffuser use, strip density, and surface finish.
Surface reflectance, work-area distance, brightness, and diffusion are conditional placement factors rather than fixed rules. Reflected light may improve visibility on some surfaces while increasing glare on others. Work-area distance can influence how effectively light reaches the intended area, while brightness and diffusion can alter the balance between visibility, glare, and shadow. Placement factors that affect visibility, glare, and shadow are easier to evaluate when causes and decisions are separated in the table below.
| Entity or factor | Attribute or criterion | Value or condition | Effect or decision |
|---|---|---|---|
| Strip position | Visibility | Aligned with the task area | May improve useful light where visibility is needed |
| Direction | Shadow | Light aimed away from the task area | May leave a shadow area in important locations |
| Viewing angle | Glare | Direct sightline to exposed LEDs | May increase glare line visibility |
| LED exposure | Visual comfort | Exposed LEDs remain visible | May appear distracting in certain viewing positions |
| Surface reflectance | Reflected light | Reflective surface finish | May increase light spread or make glare more noticeable |
| Work-area distance | Visibility | Greater distance from the task area | May reduce useful illumination where it is needed |
| Brightness | Visual balance | Higher perceived output | Depends on placement conditions and surface finish |
| Diffusion | Light spread | Diffused or shielded light source | May soften LED exposure and alter shadow appearance |
Placement factors that affect visibility, glare, and shadow are illustrated below to show how strip position, viewing angle, LED exposure, shadow area, and diffusion influence placement quality. The image highlights common causes of useful light, distracting glare, and uneven illumination.
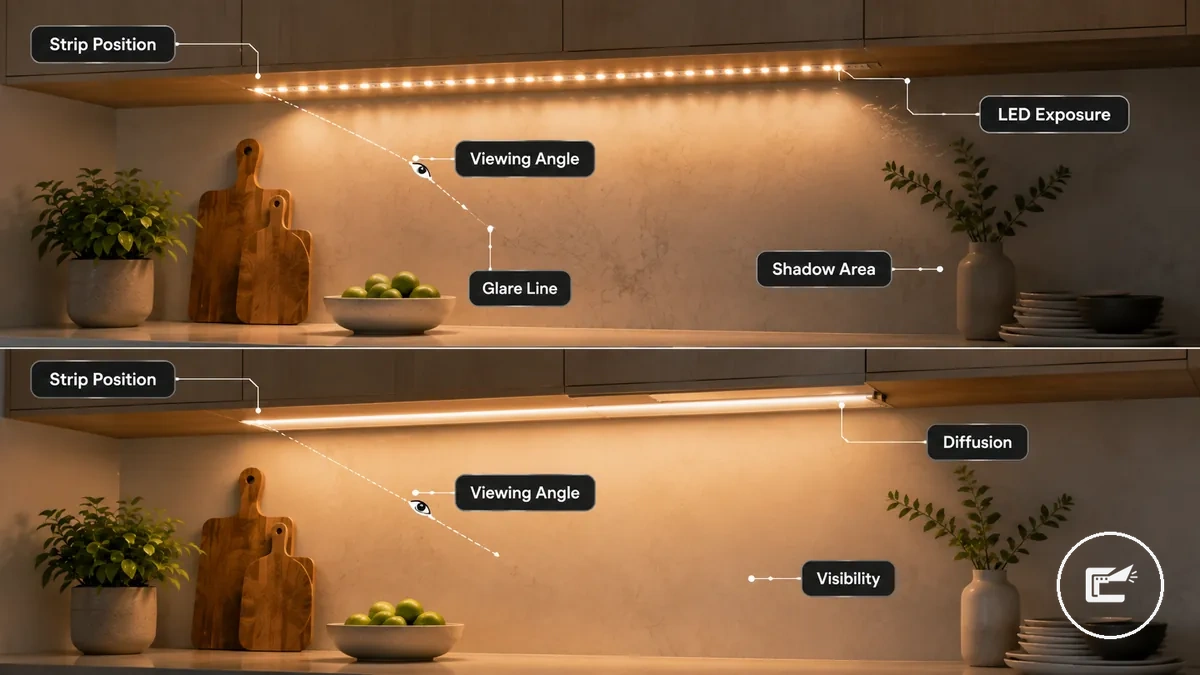
brightness and diffusion choices should be evaluated alongside placement because diffuser use, strip density, surface reflectance, and viewing angle can change how visibility, glare, and shadow are perceived.
Front, middle, and rear strip positions under cabinets
Front, middle, and rear strip positions under cabinets depend on the balance between counter visibility, glare, and shadow behavior. A different strip setback can change how light reaches the work surface and how visible the light source becomes. Position choice depends on counter depth and viewing angle.
A front position near the cabinet lip may improve counter visibility, but glare risk can increase when the LEDs are more exposed from normal sightlines. A middle position often provides a more balanced light spread, although shadow behavior can still vary with cabinet depth and countertop material. A rear position may direct more light toward the backsplash, where backsplash reflectance and countertop material can influence the outcome and may limit task-area visibility in some situations.
Front, middle, and rear strip positions under cabinets can be compared through their local tradeoffs rather than a universal rule.
| Position | Light spread | Glare or shadow risk | Best-fit use case |
|---|---|---|---|
| Front position | More direct light toward the counter surface | Glare risk may increase when LED exposure is visible below the cabinet lip | May suit areas where counter visibility is the primary concern |
| Middle position | Balanced spread across the work area | Shadow behavior depends on cabinet depth and viewing angle | May suit spaces seeking a balance between visibility and visual comfort |
| Rear position | More light directed toward the backsplash through reflected light | Task-area visibility may be reduced depending on backsplash reflectance and countertop material | May suit locations where reflected light is preferred over direct illumination |
Strip direction, viewing angle, and exposed LEDs
When visible diodes reduce comfort or draw attention away from the illuminated area, strip direction, viewing angle, and exposed LEDs become key evaluation criteria. Light that falls directly within the line of sight may make the strip more noticeable than the surface it is intended to illuminate. Exposed LEDs can contribute to glare and uneven light when diode visibility remains high from common viewing positions.
Strip direction influences where light spread appears and how visual cleanliness is perceived across the illuminated area. Viewing angle affects whether exposed LEDs remain visible from a seating position or standing position, which can change comfort levels. Diffuser use, cabinet lip coverage, and reflective surfaces may alter the outcome, so glare risk and diode visibility depend on local conditions rather than a fixed rule.
Strip direction, viewing angle, and exposed LEDs can be assessed through the following visual-comfort checks.
- Line of sight: Check whether exposed LEDs remain visible from a normal seating position or standing position, as direct visibility may increase glare.
- Strip direction: Assess whether light is aimed toward the intended surface or toward common viewing angles where a glare line may become noticeable.
- Diffuser use: Consider whether diffuser use may reduce diode visibility and create a softer light appearance under local conditions.
- Cabinet lip: Review whether the cabinet lip provides partial coverage, since a shielded strip may improve visual cleanliness from typical sightlines.
- Reflective surfaces: Check nearby reflective surfaces because reflections may increase the visibility of exposed LEDs depending on viewing angle, seating position, and room layout.
Brightness, color temperature, and diffusion by placement
Brightness, color temperature, and diffusion by placement should be interpreted through placement context rather than as isolated specifications. The same light quality can create a different effect when the placement area, viewing conditions, and surrounding surfaces change. Placement context changes how light-quality attributes feel.
Brightness relates to the brightness need of a placement area and may influence visibility or glare depending on local conditions. Color temperature affects color impression, and warm light or cool light can appear different when cabinet surfaces, materials, or viewing angles change. Diffusion affects diffusion value by influencing exposed LEDs, softened light, and visual comfort, while the user outcome depends on placement context rather than a fixed specification.
Brightness, color temperature, and diffusion by placement can be interpreted through the placement area and the resulting light-quality effect.
| Placement area | Light-quality attribute | Condition | Likely effect |
|---|---|---|---|
| Countertop work area | Brightness | Higher brightness need for task visibility | May improve visibility but can increase glare when light is more exposed |
| Display cabinet | Color temperature | Color impression influenced by cabinet surface and displayed objects | May change how objects and surfaces appear |
| Shelf lighting | Diffusion | Exposed LEDs remain visible within the placement area | Diffuser use may create softened light and improve visual comfort |
| Closet or wardrobe | Light quality | Placement context shapes brightness need and diffusion value | User outcome may vary with storage layout and viewing conditions |
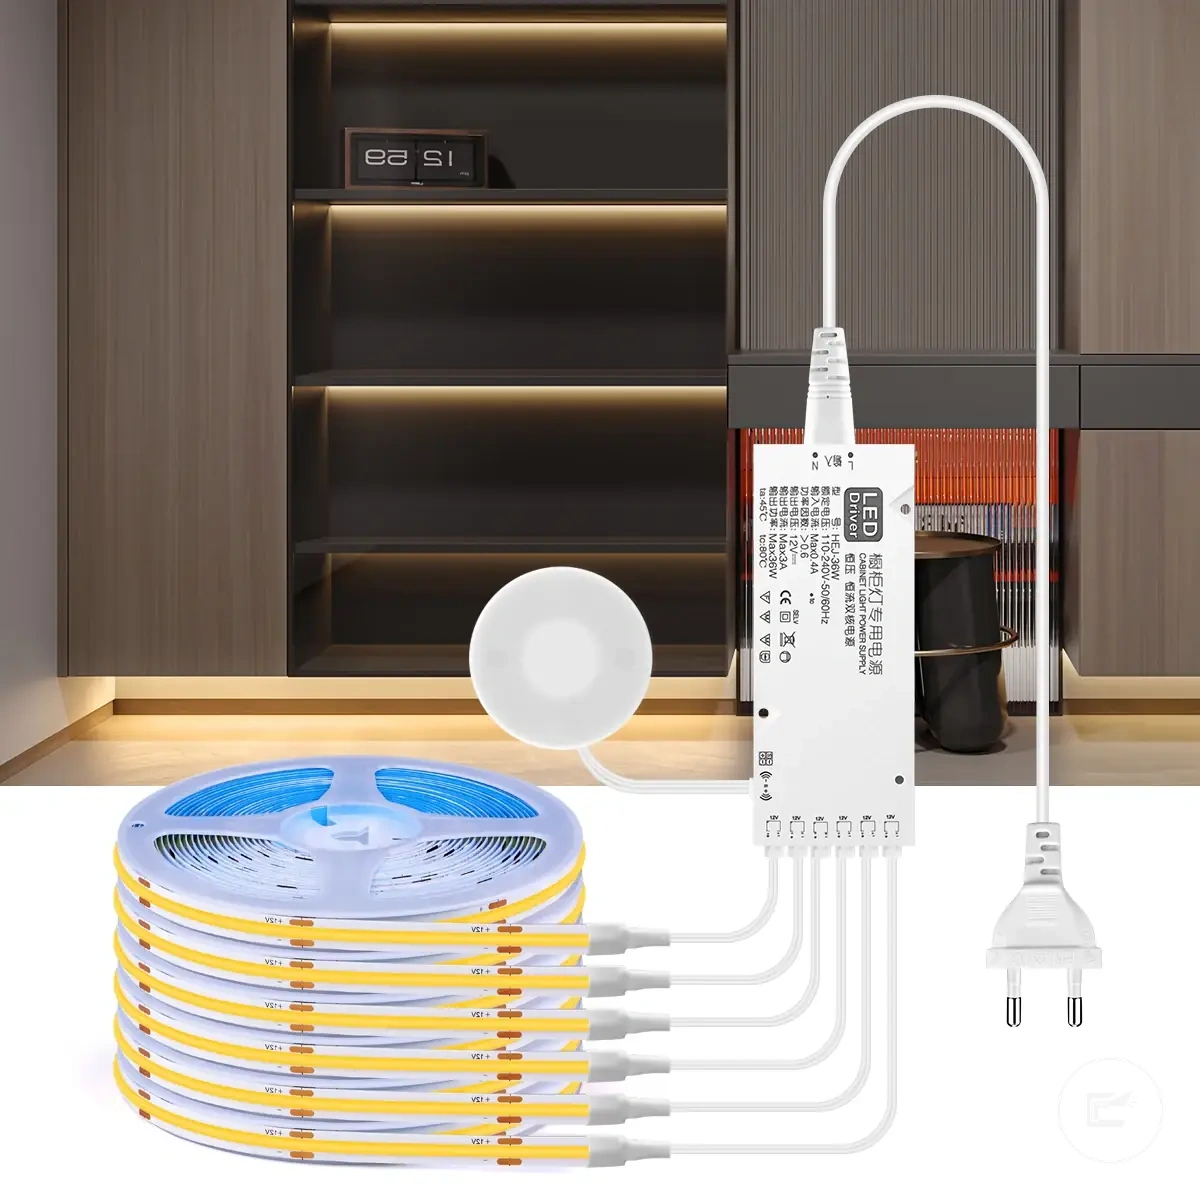
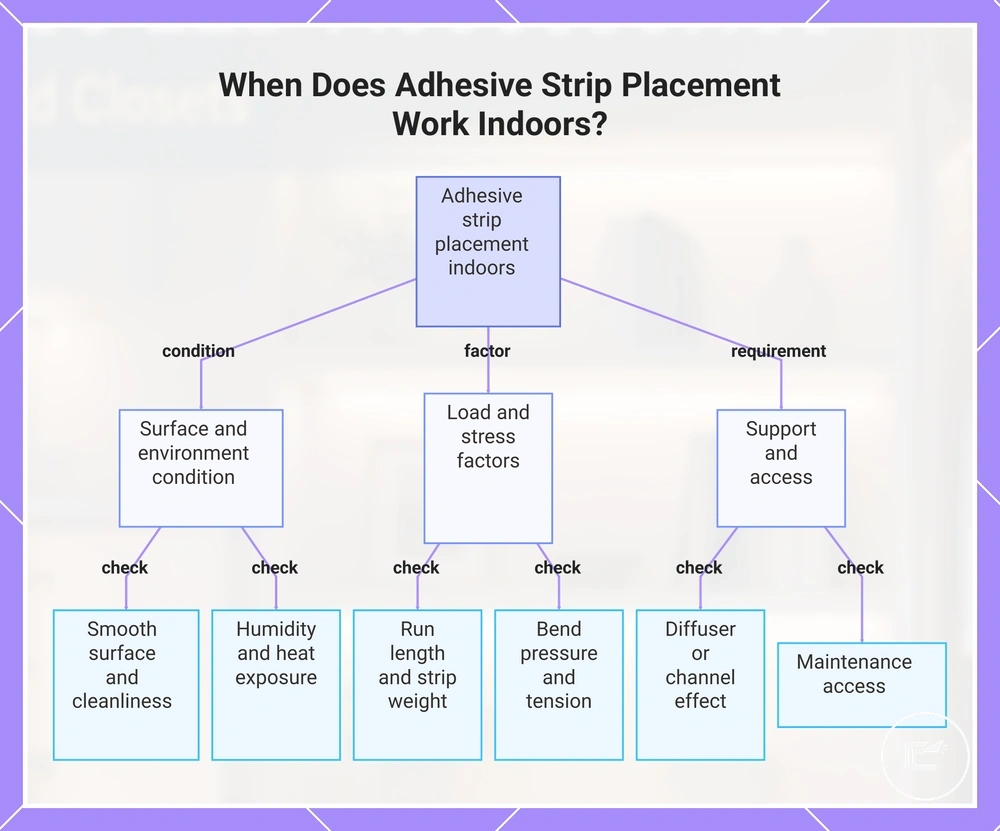
When adhesive strip placement works indoors
Adhesive strip placement works indoors when surface condition, run length, access, and expected load match the limits of the adhesive backing. A stick-on strip can suit light-duty placement on stable indoor surfaces, but adhesive placement cannot solve every mounting challenge. Adhesive suitability depends on surface, load, and access.
Adhesive strip placement depends heavily on surface material and the condition of the mounting surface. Dust, grease, or residue may reduce adhesion reliability even when the adhesive backing initially appears secure. Humidity and heat exposure can also affect how well the adhesive remains attached over time. Adhesion risk often increases when the surface is uneven, contaminated, or exposed to changing indoor conditions.
Run length, bend pressure, strip weight, diffuser or channel use, and maintenance access can influence whether adhesive strip placement remains appropriate. Longer runs or heavier strips may place more stress on the mounting surface, especially when the strip changes direction or experiences bend pressure. When adhesive strip placement works indoors, the checklist below verifies whether the conditions support light-duty reliability rather than relying on adhesive backing alone.
- Surface material: Smooth, stable surface material may support more reliable adhesion, while uneven surfaces can increase risk.
- Dust and grease: Dust or grease on the mounting surface may reduce adhesive contact and holding reliability.
- Humidity and heat exposure: Higher humidity or heat exposure may increase adhesion risk depending on the location.
- Run length and strip weight: Longer run length or greater strip weight may require additional support.
- Bend pressure: Sharp bends or constant tension may increase adhesive stress.
- Diffuser or channel use: A diffuser or channel can change expected load and may make support clips worth considering in some situations.
- Maintenance access: Easier maintenance access can reduce difficulty if inspection or adjustment becomes necessary.
Adhesive strip placement is often acceptable for light-duty indoor use when the mounting surface is clean, stable, and not subject to excessive stress. It may be less suitable when surfaces are exposed, warm, uneven, or expected to carry greater load over longer runs. Support clips or channels can provide additional support where adhesive backing alone may not match the placement conditions. Evaluate adhesive strip placement through surface condition, expected load, and maintenance access rather than assuming one mounting method fits every indoor scenario.
Here are product examples that may make comparison easier. Before buying, always review the compatibility criteria, essential features, and product details.
This chart shows the main conditions that determine whether adhesive strip placement is suitable for light-duty indoor use.
Clean, flat surfaces and short indoor runs
Adhesive strip placement depends on a clean surface, a flat surface, and a short indoor run. Clean, flat surfaces usually support better adhesive contact because more of the adhesive backing can remain in contact with the mounting area.
Short indoor runs may place less pull on adhesive strip placement than longer strip length layouts. Dry contact, an appropriate bend radius, and a prepared surface can help support adhesive contact under local conditions. Adhesion can still vary by material, heat, humidity, and strip weight, so surface preparation does not ensure long-term performance.
Clean, flat surfaces and short indoor runs can be checked through the points below to verify local placement reliability.
- Surface smoothness: Check whether the mounting area provides a smooth surface with consistent adhesive contact.
- Dust removal: Confirm that dust removal is complete because loose particles may reduce contact reliability.
- Grease removal: Verify that grease removal addresses residue that may interfere with adhesion.
- Dry contact: Check that the prepared surface allows dry contact before adhesive strip placement.
- Bend radius and strip length: Review whether the bend radius is gentle and the strip length remains a short run with reduced pull on the adhesive backing.
When clips, channels, or alternate mounting may be needed
When adhesive alone may not provide enough support for the placement conditions, clips, channels, or alternate mounting may be needed. Mounting support can help when strip weight, surface texture, or placement orientation increases adhesion risk. Support is often needed when adhesive conditions are weak.
Heavier strips, diffuser channels, long runs, textured surfaces, warm areas, vertical placements, and visible-edge placements can change how mounting loads are distributed. Clips, channels, and alternate mounting may support placement reliability when adhesive alone faces additional stress. The decision depends on strip weight, expected load, surface texture, warmth, and placement exposure rather than a single mounting method.
When clips, channels, or alternate mounting may be needed, the checklist below helps decide whether additional mounting support may reduce placement risk.
- Heavier strips: Greater strip weight may increase the need for mounting support beyond adhesive alone.
- Diffuser channels: Diffuser channels can add expected load and may make channels or support clips worth considering.
- Long runs: Longer runs may create more pull on the mounting surface depending on strip weight and placement conditions.
- Textured surfaces: Surface texture may reduce adhesive contact, making alternate mounting a reliability consideration.
- Warm areas and vertical placements: Heat exposure and vertical placements may increase adhesion challenges when expected load is higher.
- Visible-edge placements: Channels may support edge control and may reduce placement risk where strip visibility is a concern.
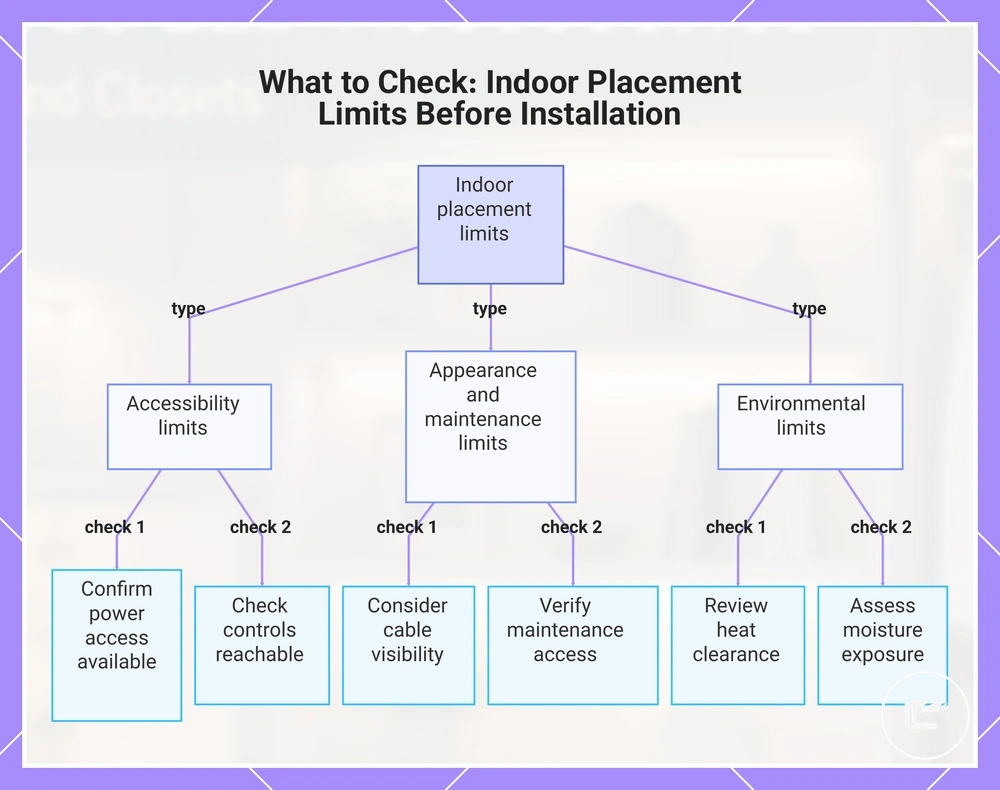
Indoor placement limits before installation planning
Indoor placement limits should be checked before installation planning because a placement idea may appear suitable until access, visibility, and environmental conditions are considered. These practical limits help identify conditions that may affect safe use and everyday convenience. Indoor placement ideas need practical limits before installation.
Power access, cable visibility, reachable controls, and maintenance access often influence whether a location remains practical after installation. Limited power access or difficult-to-reach controls may reduce convenience during normal use. Cable visibility can affect the intended appearance of the space, while maintenance access may become important if inspection or adjustment is needed later. These factors act as placement constraints rather than installation requirements.
Heat clearance, moisture exposure, and surface condition can also affect indoor placement limits. Warm areas, moisture-prone locations, or unstable surfaces may introduce conditions that influence placement decisions and safety limits. This section identifies placement limits for installation planning and safe use, not step-by-step installation requirements or an installation walkthrough.
Indoor placement limits before installation planning can be reviewed through the checklist below to verify whether a location remains practical within common placement constraints.
- Power access: Confirm that power access is available within the intended placement area.
- Cable visibility: Consider whether visible cables may affect the placement outcome.
- Reachable controls: Check whether controls remain accessible during normal use.
- Maintenance access: Verify that the location allows reasonable future access for inspection or adjustment.
- Heat clearance: Review whether nearby heat sources may influence the placement decision.
- Moisture exposure: Consider whether the area may be exposed to moisture under normal conditions.
- Surface condition: Assess whether the mounting surface appears stable for the intended placement.
This chart groups the key placement constraints into three categories to verify before installation planning.